Posts

Artistic Design

Image
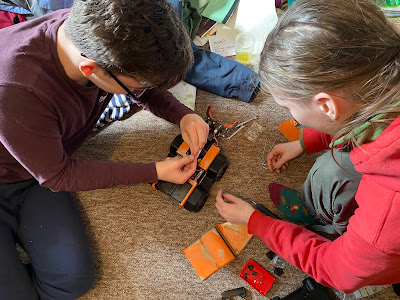
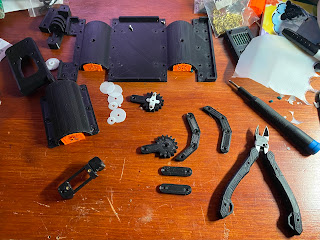
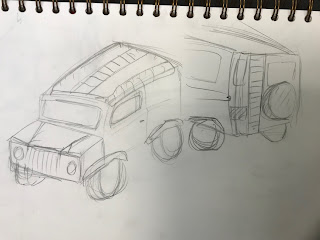
  To fit in with the disaster theme, we decided to theme the robot after a beat up land rover or jeep. We designed the chassis in CAD, and 3D printed it, before applying paint. We started with a filler -primer to try and fill in some of the layer lines and prep it for painting, before covering it with a chrome layer.  Next we used vaseline to protect areas of silver, before painting it all orange and washing the vaseline off.  This created a chipped paint effect, but also stripped some of the chrome paint, revealing the dull orange primer, making the car seem rusted. Although this was not our intention, it worked out quite well. We chose to do a bright orange overcoat, as it has connotations of danger.

Autonomous Barrel Collecting

We decided to tackle the Eco-Disaster Challenge autonomously using a Raspberry Pi camera and the  OpenCV library for image processing. First we calibrate for the different colours the colour needs to recognise. Next, the  script initialises the robot's control interface, stops the robot, and sets the operational mode. Camera configuration is set up, including preview format and size. Main Loop: The main loop captures images from the camera and analyzes them to detect objects of interest based on calibrated colors. It alternates between searching for red/yellow and green/blue objects. It moves the robot towards the detected object and performs specific actions (like grabbing or placing) depending on the mode. Movement Control: move_towards: Moves the robot towards the detected object, adjusting its trajectory based on colour detection and distance. Colour Detection: The method begins by capturing an image from the camera using self.take_photo(picam). The image is processed to detect

Line Following

Image
     One of the challenges in PiWars 2024 is 'Lava Palava' which is an autonomous challenge.      The aim of the challenge is to drive from one end of the course to the other as fast as possible, outrunning the lava flows from a volcanic eruption. We are doing this by following the white line on the course. This is how our code works: initialises the camera at a size of 84*64 pixels takes a photo turns the photo greyscale splits the photo into 10 segments turns the robot towards the average brightest segment When we first tested this, it worked well with minimal tweaking. However, when we swapped out the old motors for more powerful ones, we found the the robot was turning much too fast, though this was easily fixed, despite the mad dashes for escape!

Design and Creation

Image
To be as flexible as possible with what we wanted our robot to look like throughout the making process, we decided to custom  design and 3D print our entire chassis. We designed everything in CAD, with the help of our mentor, from the base-board and motor-brackets to the artistic car-like cover. We were particularly proud of the headlights shape, as it came out really well and is a small, but important part of selling the land rover look.

The Beginnings of a Robot

Image
To begin with, we looked at what our options were and then strategised. We decided to use the motors and custom motor brackets from a previous robot, as they were worked well on our PiWars robot last year. Our aim for this session was to create a drivable robot. We used Solidworks to design a simple chassis with holes to bolt on the motors, pi and batteries. We made it out of clear orange acrylic which we cut out on the laser cutters at Cambridge Makespace. Once we had assembled the robot, we used the code off of the previous robot to drive it about and ended up with a successful robot. 

Our Intentions

Image
Our Intentions The theme for PiWars 2024 is disaster zone, so we have decided to theme our robot around a post-apocalyptic Land Rover.   We are aiming to compete in all of the challenges, and are in it to win it!